Erase Material ( Modeling )

Tool summary :

  • Can be used in Modeling to erase one or more materials.
  • If you do not preselect materials prior to invoking Erase Material , then there is no need to use a selection filter. Only materials can be selected when you first invoke Erase Material then select the material(s).
  • Do not use Erase Material in place of Erase Member . Even if you use Erase Material to erase member main material, the member continues to exist, and its main material will be regenerated during Create Solids . To remove a member from the 3D model, you need to use Erase Member .
  • Also, you cannot erase material that is part of a member that has its " Model completed " date set.
  • Instead of erasing system connection materials, you may be able to get rid of these materials by using connection design locks . For example, you can erase a beam web doubler by entering a plate depth, plate width and plate thickness of zero (0.
  • Although Delete may be used instead of Erase Material , you may prefer to use Erase Material in order to have the option to erase the same material on members with the same mark or different marks. See step 4 .
  • See the quick instructions and the detailed instructions .

Also see :

page 1 | contents | model > material > | model -- material | material tools


   Example (also see the Detailed instructions ) :

In-tool selection versus preselection: This example shows in-tool selection , which works the same way regardless of the selection filter . Preselection reverses steps 1 and 2. First you select one or more materials in Select Items Mode , then you invoke Erase Material. Preselection also requires the use of the ' Material ' selection filter if you want to be able to click on connection materials and member main materials to select them.

1 . Invoke Erase Material .
2 . Hold down the Shift key and left-click ( Select + ) the materials that you want to delete. They change to the " Primary selection color " (green).
3 . Options to erase materials on like members may appear along with the warning shown. Press the " OK " button to continue.
4 . The materials are now erased.

page 1 | contents | model > material > | model -- material | material tools | top


   Step-by-step instructions (also see the quick instructions ) :

The following instructions assume that you are using a 3-button mouse. You must do either step 1c (preselection) or step 3 (in-tool selection) to perform this operation.

1 . Before using this tool:

1a : Make sure that the member(s) associated with the to-be-erased materials are displayed in one of the three solid forms .

1b (optional) : If you are going to do 1c, you must set the selection filter to ' Material ' if you want to be able to click on connection materials and member main materials to select them.

Select Items bindings (step 1c)

1c ( optional ): In Select Items mode with an appropriate selection filter selected, use Select or Select + (or draw an area box ) to select the material(s) that you want to erase. When selected, the materials will be displayed in the " Primary selection color ," which by default is green. Use Select- if you want to deselect a material.

2 . Invoke Erase Material using any one (1) of the following methods:

Methods 1, 2 & 3 : An Erase Material icon can be added to your toolbar (classic) or ribbon (lightning). The icon, keyboard shortcut or context menu command can be found in the group named ' Model -- Material '. For lightning, Customize Interface is used to configure ribbons, keyboards, the context menu and modes.

Method 4 : If " Modeling layout style " is ' Classic ', you can use the menu system to choose Model > Material > Erase .

3 . Skip this step if you already selected material(s) in step 1c.

Select Item(s) bindings

3a (if you didn't preselect) : Erase Material prompts you to use Select Item(s) mouse bindings to Select or Select + one or more materials. You can also select materials by drawing an area box or using the Model Tree . Press the Enter key or right-click ( Menu ) and choose " OK " on the context menu to signal that you are done selecting materials.

4 . Skip this step if it does not apply. If members that are like the member from which you are erasing the material(s) exist in your current Job, the Material Erase - Options dialog opens. The dialog's " All members with the same mark " option applies to members with the same member piecemark . The " All like members (any mark) " option applies to those same members and may additionally apply to members that are exactly the same but have different marks -- for example, because you have applied a " User piecemark ."

Alternative 1 : Check the box for one or the other of these options ( ) if you want to erase the selected material(s) from more than one member (the total number of members is listed in parenthesis). Press the " OK " button. Go to step 5.

Alternative 2 : Leave both options not checked ( ) if you want to erase materials from only the one member whose materials you selected for erasing. Press the " OK " button. Go to step 5.

5 . The SDS2 Warning window opens. At the very least, it informs you that material will be erased.
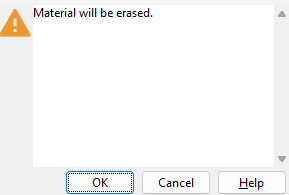
 If you are erasing system connection material, the window also lists by member number and piecemark each member affected and notifies you that the " Connection will be changed to a Graphical User Connection . "

Alternative 1 : Press the " OK " button at the bottom of the window to erase the materials. Go to step 6.

Alternative 2 : Press the " Cancel " button to cancel the Erase Material operation without erasing any materials. The material(s) cease to be selected (displayed in the " Primary selection color ") if selected in step 3; the materials remain selected if selected in step 1c. Do not continue.

6 . Your computer screen redraws, and the material you selected for erasing disappears. The mouse bindings that were active before you invoked Erase Material become active again. Any members affected by this operation are marked for automatic detailing.

page 1 | contents | model > material > | model -- material | material tools | top